
So you’re developing a beautiful screen, and you need to update it after an action (e.g. you clicked a button and an item should be added to a list). The screen infrastructure has some affordances for synchronizing slots and properties, but the latter are integer only and slots are for itemstacks and inventories only. What if you want to update some more complex data?
Turns out you have to do this with some networking magic, in order to send the update from the client to the server (when you click the button), and then an update from the server to the client again (after the server has updated). And that’s basically it. Easier said than done, so let’s see how we would approach this.
I’m going to assume how you know how to add a block entity to a block, so I’m not going to show that here.
Let’s start
Our block entity looks like this:
public class SampleBlockEntity extends BlockEntity {
    private List<Date> dates = new ArrayList<>();

    public SampleBlockEntity(BlockPos pos, BlockState state) {
        super(ModBlockEntities.SAMPLE, pos, state);
    }

    public void addDate() {
        dates.add(new Date());
    }

    public List<Date> getDates() {
        return dates;
    }
}
We’ll turn this into a screen handler factory by implementing ExtendedScreenHandlerFactory. Normally, you’d implement just NamedScreenHandlerFactory, but ExtendedScreenHandlerFactory adds another method to initialize the client side screen handler. We’ll implement the 3 necessary methods: createMenu(), getDisplayName(), and getScreenOpeningData():
public class SampleBlockEntity extends BlockEntity
                               implements ExtendedScreenHandlerFactory<SampleScreenData> {
    // ...

    @Override
    public Text getDisplayName() {
        return Text.literal("Sample");
    }

    @Override
    public ScreenHandler createMenu(int syncId, PlayerInventory playerInventory, PlayerEntity player) {
        return new SampleScreenHandler(syncId, playerInventory, dates, pos);
    }

    @Override
    public SampleScreenData getScreenOpeningData(ServerPlayerEntity serverPlayerEntity) {
        return new SampleScreenData(dates, pos);
    }
}
The screen handler
We’ll need 2 new classes: the screen handler (SampleScreenHandler) and the screen opening data (SampleScreenData).
public class SampleBlockEntity extends BlockEntity
                               implements ExtendedScreenHandlerFactory<SampleScreenData> {
    // ...

    @Override
    public ScreenHandler createMenu(int syncId, PlayerInventory playerInventory, PlayerEntity player) {
        return new SampleScreenHandler(syncId, playerInventory, dates, pos);
    }

    @Override
    public SampleScreenData getScreenOpeningData(ServerPlayerEntity serverPlayerEntity) {
        return new SampleScreenData(dates, pos);
    }
}
The base screen handler looks like this:
public class SampleScreenHandler extends ScreenHandler {
    private List<Date> dates;
    private BlockPos entityPos;

    // invoked by Minecraft on the client
    protected SampleScreenHandler(int syncId, PlayerInventory inventory, SampleScreenData data) {
        this(syncId, inventory, data.dates(), data.entityPos());
    }

    // invoked on the server from the screen handler factory
    public SampleScreenHandler(int syncId, PlayerInventory inventory,
                               List<Date> dates, BlockPos entityPos) {
        super(SampleMod.SAMPLE_SCREEN_HANDLER, syncId);
        this.dates = dates;
        this.entityPos = entityPos;
        addPlayerSlots(inventory, 8, 84);
    }

    public List<Date> getDates() {
        return dates;
    }

    public void setDates(List<Date> dates) {
        this.dates = dates;
    }

    public BlockPos getEntityPos() {
        return entityPos;
    }

    @Override
    public ItemStack quickMove(PlayerEntity player, int slot) {
        return ItemStack.EMPTY;
    }

    @Override
    public boolean canUse(PlayerEntity player) {
        return true;
    }
}
As you can see it has 2 constructors: one will be invoked on the client, the other one is the one you invoke on the server from your block entity. The first has a fixed set of arguments, the second one can have as many arguments as you need. There are 2 overrides that we have to implement, but they are out of scope for this tutorial (and they are irrelevant to continue).
To initialize the client side instance with the same data as the server side instance, we use the screen opening data. This is an object where you pass the necessary data and which is passed into the client side constructor so you can have the necessary data ready to initialize the client side instance.
You might also notice that we need an entity position: we’ll have a use for this later when we update our screen.
Our sample screen data object is pretty simple: it just contains our dates data:
public record SampleScreenData(List<Date> dates, BlockPos entityPos) {
}
Now that we have that, we can register our screen in our mod initializer:
public static final ScreenHandlerType<SampleScreenHandler> SAMPLE_SCREEN_HANDLER =
    Registry.register(
        Registries.SCREEN_HANDLER,
        Identifier.id("samplemod", "sample"),
        new ExtendedScreenHandlerType<>(SampleScreenHandler::new, SampleScreenData.CODEC)
    );
Hm, we’re missing the codec! We need this so Minecraft can serializer your data coming from the server going to the client. The system comes with a bunch of hardcoded packet codes (check out the PacketCodec interface and the fields in PacketCodecs, for example), but in this case we’ll have to roll our own since we’re dealing with a list of dates.
To encode them, we’ll convert each data to seconds-since-the-epoch, and use those long values to store the dates. We can implement this like this:
public record SampleScreenData(List<Date> dates, BlockPos entityPos) {
    public static final PacketCodec<RegistryByteBuf, SampleScreenData> CODEC = new PacketCodec<>() {
        @Override
        public void encode(RegistryByteBuf buf, SampleScreenData value) {
            // Encode the entity pos first
            BlockPos.PACKET_CODEC.encode(buf, value.entityPos());

            // we need to know how many, too!
            buf.writeLong(value.dates().size());
            // convert each to seconds and write away
            for (var date: value.dates()) {
                var seconds = date.toInstant().getEpochSecond();
                buf.writeLong(seconds);
            }
        }

        @Override
        public SampleScreenData decode(RegistryByteBuf buf) {
            // Decode the entity pos first
            var entityPos = BlockPos.PACKET_CODEC.decode(buf);

            // figure out how many to read
            var size = buf.readLong();
            // read and convert each date
            var dates = new ArrayList<Date>();
            for (var i=0; i<size; ++i) {
                var seconds = buf.readLong();
                dates.add(Date.from(Instant.ofEpochSecond(seconds)));
            }
            return new SampleScreenData(dates);
        }
    };
}
Now that is out of the way, we have our data source (the entity), and our screen handler to handle the data for the screen.
The screen
Next up, the client side screen:
public class SampleScreen extends HandledScreen<SampleScreenHandler> {
    private int originX;
    private int originY;
    // ...

    public SampleScreen(SampleScreenHandler handler, PlayerInventory inventory, Text title) {
        super(handler, inventory, title);

        // ...
    }

    protected void init() {
        super.init();

        originX = (width - backgroundWidth) / 2;
        originY = (height - backgroundHeight) / 2;
    }

    private List<DateListWidget.DateEntry> getDateEntries() {
        return getScreenHandler().getDates().stream().map(d -> DateListWidget.DateEntry.of(d, getTextRenderer())).toList();
    }

    @Override
    protected void drawBackground(DrawContext context, float delta, int mouseX, int mouseY) {
        // ...
    }
}
Don’t forget to register it in the client side mod initializer:
public class SampleModClient implements ClientModInitializer {
    @Override
    public void onInitializeClient() {
        // ...
        HandledScreens.register(SampleMod.SAMPLE_SCREEN_HANDLER, SampleScreen::new);
    }
}
Let’s say we want our screen to look like this.
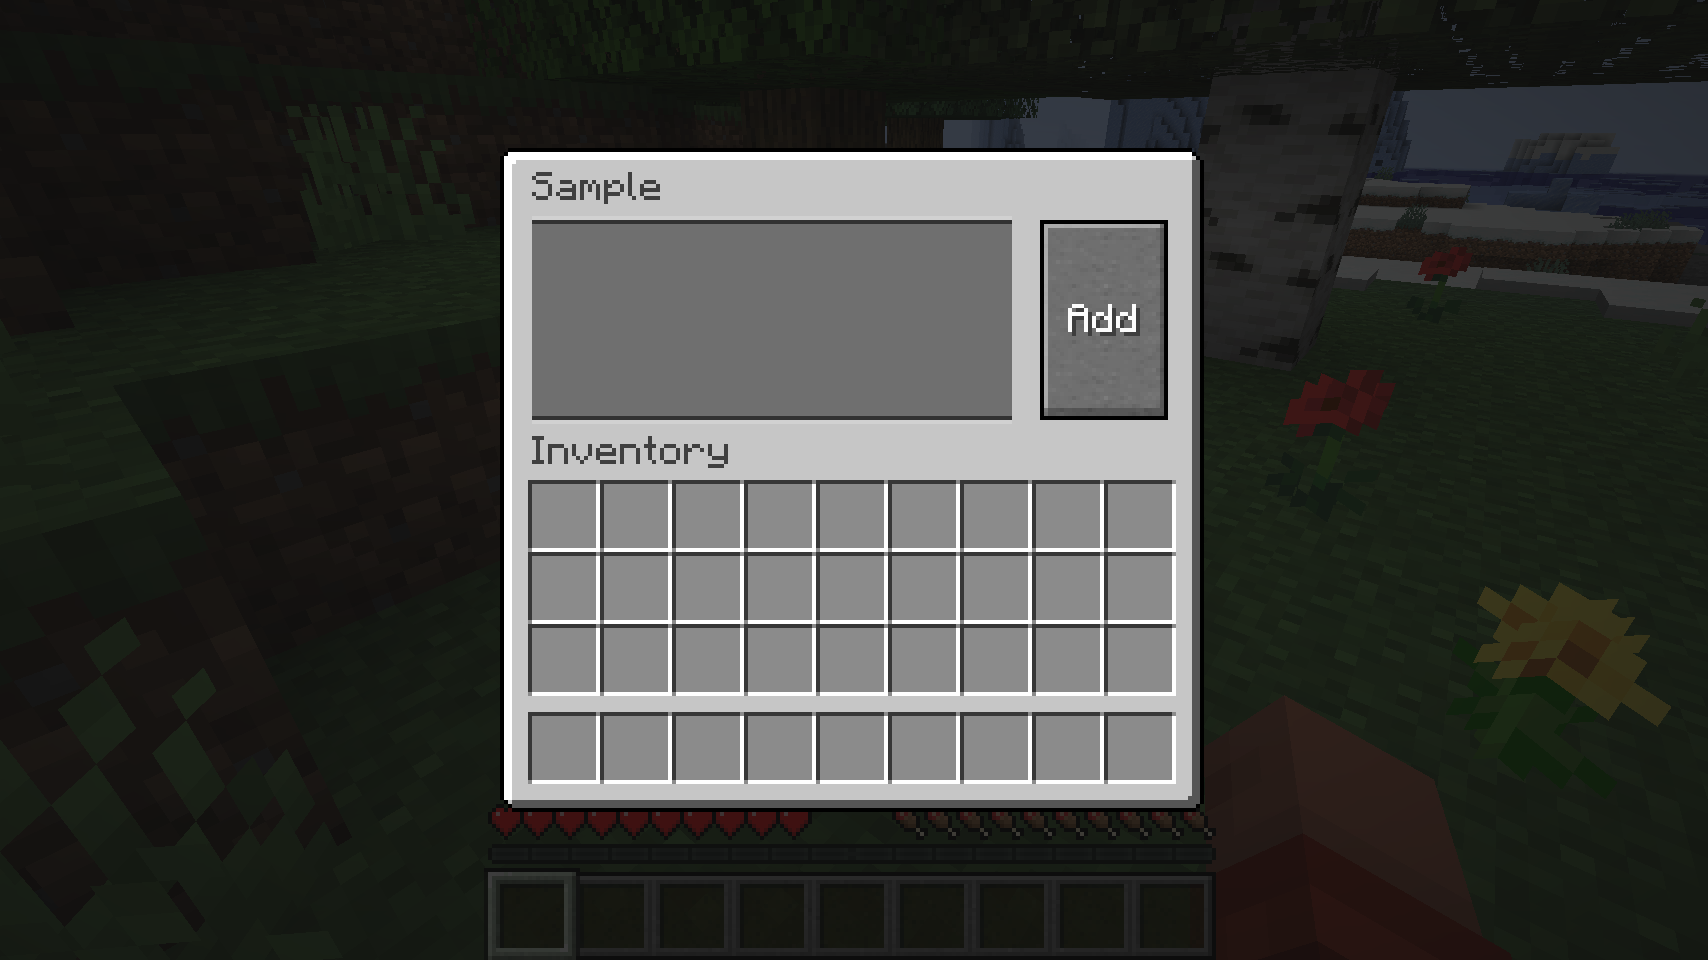
Apart from implementing the background, we’ll need to add a list widget (check out a potentional implementation) and a button:
public class SampleScreen extends HandledScreen<SampleScreenHandler> {
    // ...

    protected void init() {
        super.init();

        originX = (width - backgroundWidth) / 2;
        originY = (height - backgroundHeight) / 2;

        createListWidget(getDateEntries());

        var addButtonWidget = ButtonWidget.builder(Text.literal("Add"), button -> {
            // Empty... for now
        }).size(32, 50).build();
        addButtonWidget.setPosition(originX + 135, originY + 18);
        addDrawableChild(addButtonWidget)
    }

    private void createListWidget(List<DateListWidget.DateEntry> dateEntries) {
        listWidget = addDrawableChild(new DateListWidget(client, 120, 48,
                                                         originX + 8, originY + 19, 12));
        listWidget.setPosition(originX + 8, originY + 19);
        dateEntries.forEach(entry -> listWidget.addEntry(entry));
    }

    // ...
}
And that’s it for displaying our dates. But we need to implement the “add” action, because that’s why we are here in the first place. So let’s do that.
What we need to do next is:
- send a message from the client to the server to add a date
- add a data serverside
- send a message back to the client with the updated dates so we can display them
Send a message to the server
First, we’ll need to add a payload class that we will use to send our message to the server (there’s a Fabric tutorial on this too if you want to learn more).
public class AddDateC2SPayload implements CustomPayload {
    public static Id<AddDateC2SPayload> ID = new CustomPayload.Id<>(
        Identifier.of("samplemod" ,"add_date_c2s_payload")
    );
    public static PacketCodec<RegistryByteBuf, AddDateC2SPayload> CODEC
        = PacketCodec.unit(new AddDateC2SPayload());

    @Override
    public Id<? extends CustomPayload> getId() {
        return ID;
    }
}
It’s not very complicated, because we don’t have any payload data: we just want to get the message across. Then, we’ll use this payload to send it to the server:
First, we’ll need to add some code to the button pressed handler in our screen:
var addButtonWidget = ButtonWidget.builder(Text.literal("Add"), button -> {
    ClientPlayNetworking.send(new AddDateC2SPayload(getScreenHandler().getEntityPos()));
});
Then we’ll have to receive this message on the server:
public class SampleMod implements ModInitializer {
    @Override
    public void onInitialize() {
        // ...
        PayloadTypeRegistry.playC2S().register(AddDateC2SPayload.ID, AddDateC2SPayload.CODEC);
        ServerPlayNetworking.registerGlobalReceiver(AddDateC2SPayload.ID, SampleMod::handleAddDate);
    }

    private static handleAddDate(AddDateC2SPayload payload, ServerPlayNetworking.Context context) {

    }
}
So what do we do in our handler? Fetch and update our screen handler, use it to get to our block entity (since it has the entity position), and update the entity and handlers with the new data:
private static handleAddDate(AddDateC2SPayload payload, ServerPlayNetworking.Context context) {
    context.server().execute(() -> {
        var screenHandler = context.player().currentScreenHandler;
        if (screenHandler instanceof SampleScreenHandler sampleScreenHandler) {
            var pos = sampleScreenHandler.getEntityPos();
            var blockEntity = context.player().getWorld().getBlockEntity(pos);
            if (blockEntity instanceof SampleBlockEntity sampleBlockEntity) {
                // Add a date
                sampleBlockEntity.addDate();
                // update server side screen handler
                sampleScreenHandler.setDates(sampleBlockEntity.getDates());
                // update client side screen handler
                ServerPlayNetworking.send(context.player(),
                                          new UpdateDatesS2CPayload(sampleBlockEntity.getDates()));
            }
        }
    });
}
Send a message to the client
We can update the server side screen handler just right there, but we’ll have to resort to message sending again in order to upate the client side one. Here’s our payload:
public record UpdateDatesS2CPayload(List<Date> dates) implements CustomPayload {
    public static Id<UpdateDatesS2CPayload> ID = new CustomPayload.Id<>(
        Identifier.of("samplemod", "update_dates_s2c_payload")
    );
    public static PacketCodec<RegistryByteBuf, UpdateDatesS2CPayload> CODEC = new PacketCodec<>() {
        @Override
        public void encode(RegistryByteBuf buf, UpdateDatesS2CPayload value) {
            buf.writeLong(value.dates().size());
            for (var date: value.dates()) {
                var seconds = date.toInstant().getEpochSecond();
                buf.writeLong(seconds);
            }
        }

        @Override
        public UpdateDatesS2CPayload decode(RegistryByteBuf buf) {
            var size = buf.readLong();
            var dates = new ArrayList<Date>();
            for (var i=0; i<size; ++i) {
                var seconds = buf.readLong();
                dates.add(Date.from(Instant.ofEpochSecond(seconds)));
            }
            return new UpdateDatesS2CPayload(dates);
        }
    };

    @Override
    public Id<? extends CustomPayload> getId() {
        return ID;
    }
}
The codec here looks very familiar to the codec used for the SampleScreenData since it also sends dates (but there’s no entity position in this case). In order to use this, we have to register the payload in the main mod initializer:
public class SampleMod implements ModInitializer {
    @Override
    public void onInitialize() {
        // ...
        PayloadTypeRegistry.playS2C().register(UpdateDatesS2CPayload.ID, UpdateDatesS2CPayload.CODEC);
    }
}
And then we need to register a globla receiver on the client side to receive the message. We do this in the client mod initializer:
public class SampleModClient implements ClientModInitializer {
    @Override
    public void onInitializeClient() {
        // ...
        ClientPlayNetworking.registerGlobalReceiver(UpdateDatesS2CPayload.ID,
                                                    SampleModClient::handleUpdateDates);
    }

    private static void handleUpdateDates(UpdateDatesS2CPayload payload,
                                          ClientPlayNetworking.Context context) {
    }
}
Update the client screen
And what do we do in the handler? It’s pretty simple: get the currently open screen, access the handler and update the data, and then refresh the screen.
private static void handleUpdateDates(UpdateDatesS2CPayload payload,
                                      ClientPlayNetworking.Context context) {
    context.client().execute(() -> {
        if (context.client().currentScreen instanceof SampleScreen sampleScreen) {
            sampleScreen.getScreenHandler().setDates(payload.dates());
            sampleScreen.refresh();
        }
    });
}
We didn’t have the refresh method in our screen yet, and it looks like this:
public class SampleScreen extends HandledScreen<SampleScreenHandler> {
    // ...

    public void refresh() {
        var y = listWidget.getScrollY();
        clearAndInit();
        listWidget.setScrollY(y);
    }
}
We can restore the scroll position on the list widget so that it doesn’t jump when you add a new date, or you could even have it jump to the newest item by calculating the right offset.
And that’s it! Just a few steps, right? 😄
Obviously, this becomes a bit more complicated if your data is more complicated. For instance, your codecs will become more convoluted, but you might get away with using simple data types and using the existing codecs. But the general principle will remain the same, and it’s just a matter of adjusting the code to add more or different data.