
update 2025-02-09: forgot a section! Added the entity model registration.
Minecraft has this feature call “feature renderers” that allows you to add a model to an existing model. This is used for example to show capes, but there’s also one called Deadmau5FeatureRenderer that apparently adds Deadmau5 ears to the player if they are called “Deadmau5”. The things you find perusing the Yarn mappings. 😄
But anyway, using these feature renderers yourself is a little bit more work than you’d expect it to be since there doesn’t seem to be a way to register one of these renderers without resorting to mixins.
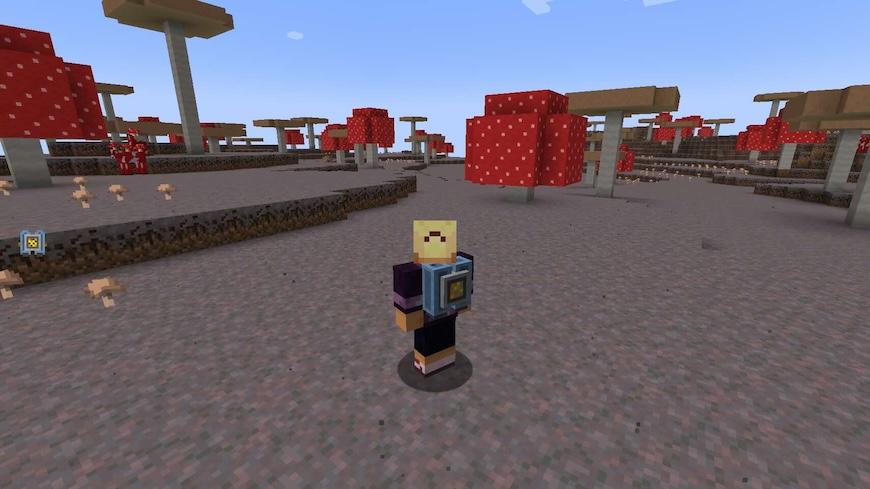
In this case, I wanted to add a jetpack model to the player when wearing a jetpack armor item:
So how did I do that? Well, it amounts to this:
- Create a model to display
- Create a feature renderer using that model to render everything
- Create a mixin for
PlayerEntityRendererthat adds a feature renderer in its constructor.
Create the model
To create the model, we create a new class in the client source section (since the model works client side only). In this case, I called it JetpackModel:
public class JetpackEntityModel<T extends PlayerEntityRenderState> extends BipedEntityModel<T> {
    public JetpackEntityModel(ModelPart root) {
        super(root);
    }
}
Next, we need to define the model. We do this by creating a method called getTexturedModelData() that we’ll use later to get the model data when rendering the model:
public class JetpackEntityModel<T extends PlayerEntityRenderState> extends BipedEntityModel<T> {
    // ...

    public static TexturedModelData getTexturedModelData() {
        var modelData = BipedEntityModel.getModelData(Dilation.NONE, 0.0F);

        var root = modelData.getRoot();
        var head = root.addChild("head");
        head.addChild("hat");
        var body = root.addChild("body");
        root.addChild("left_arm");
        root.addChild("right_arm");
        root.addChild("left_leg");
        root.addChild("right_leg");

        var canisterBuilder = ModelPartBuilder.create()
            .uv(0, 0)
            .cuboid(-3.0F, 0F, -3.0F, 2.0F, 7.0F, 2.0F, new Dilation(1.0F));
        body.addChild("canister_left", canisterBuilder, ModelTransform.pivot(-0.5F, 0, 6.0F));
        body.addChild("canister_right", canisterBuilder, ModelTransform.pivot(4.5F, 0, 6.0F));
        var thrusterBuilder = ModelPartBuilder.create()
            .uv(8, 0)
            .cuboid(-2.5F, 0F, -2.5F, 1F, 0.5F, 1.0F, new Dilation(1.0F));
        body.addChild("thruster_left", thrusterBuilder, ModelTransform.pivot(-0.5F, 7.5F, 6.0F));
        body.addChild("thruster_right", thrusterBuilder, ModelTransform.pivot(4.5F, 7.5F, 6.0F));
        var centerBuilder = ModelPartBuilder.create()
            .uv(0, 12)
            .cuboid(-4.0F, 0.5F, -3.5F, 4.0F, 4.0F, 3.0F, new Dilation(1.0F));
        body.addChild("center", centerBuilder, ModelTransform.pivot(2F, 1F, 6.5F));
        return TexturedModelData.of(modelData, 32, 32);
    }
}
It looks like a lot and I guess it is, but it’s fairly simple: you build up the model from various parts. For each part, you create a ModelPartBuilder which defines the shape of the model part. There are 2 parts to this: defining which part of the texture to use: .uv(0, 0). This defines the offset in the texture where the partial texture of this model part lives. Then, the shape itself: .cuboid(offsetX, offsetY, offsetZ, sizeX, sizeY, sizeZ). You can add a dilation argument which appears to “blow up” your model definitions. This will have impact on how the texture is used!
Once you have your model part builder, you then create a new child model part by using it with a defined (pivot) transform. The pivot defines where the anchor point of the model part is. You can also use this transform to rotate the model part, if that’s what’s needed.
Then, another part of the model is defining the entity model layer:
public class JetpackEntityModel<T extends PlayerEntityRenderState> extends BipedEntityModel<T> {
    public static EntityModelLayer JETPACK = new EntityModelLayer(Identifier.of("jetpack"), "main");

    // ...
}
We’ll use this later in the feature renderer when we instantiate our jetpack model.
Finally, you’ll have to create the texture to use for your model. There are multiple parts in our model but we can use the same texture file to define a texture for each file. In my case, the texture looks like this (blown up 8 times, the actual file is 64x64 pixels large):
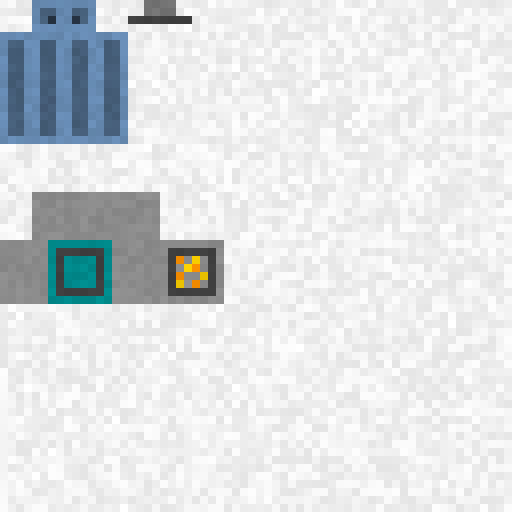
You can see the 3 parts we defined in our model: the “canister” texture in the top left corner, the “thruster” texture next to it and the “center” texture below it. You can have as many subtextures as you need in your texture file, and the size of the texture file can be larger than 64x64.
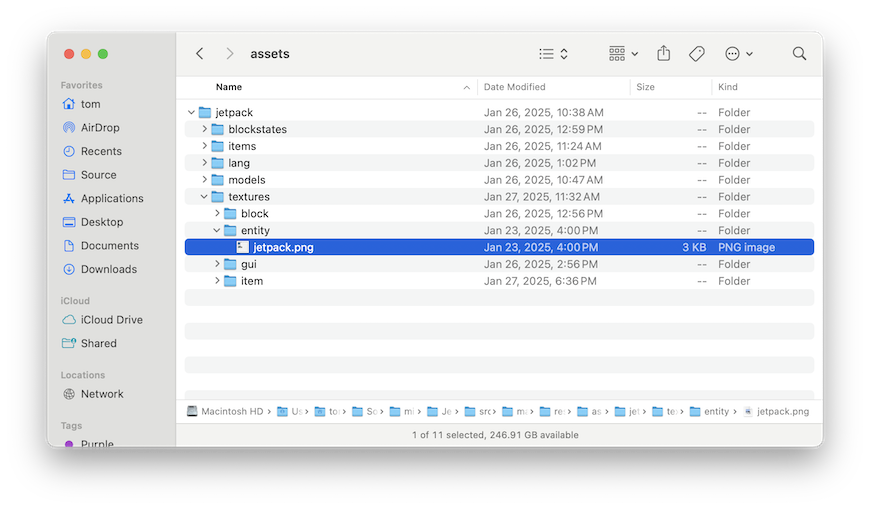
You place this file in the assets/<modid>/textures/entity/ folder under a logical name (in this case jetpack.png). This name can be anything, it will be used later when we reference the texture.
Create the feature renderer
Next up is our feature renderer.
public class JetpackFeatureRenderer extends FeatureRenderer<PlayerEntityRenderState, PlayerEntityModel> {
    public JetpackFeatureRenderer(
            FeatureRendererContext<PlayerEntityRenderState, PlayerEntityModel> context,
            LoadedEntityModels entityModels) {
        super(context);
    }
}
We need to add our model to the renderer:
public class JetpackFeatureRenderer extends FeatureRenderer<PlayerEntityRenderState, PlayerEntityModel> {
    private final JetpackEntityModel model;

    public JetpackFeatureRenderer(
            FeatureRendererContext<PlayerEntityRenderState, PlayerEntityModel> context,
            LoadedEntityModels entityModels) {
        super(context);
        this.model = new JetpackEntityModel(entityModels.getModelPart(JetpackEntityModel.JETPACK));
    }
}
And override the render method to customize our rendering:
public class JetpackFeatureRenderer extends FeatureRenderer<PlayerEntityRenderState, PlayerEntityModel> {
    // ...

    @Override
    public void render(MatrixStack matrices, VertexConsumerProvider vertexConsumers, int light,
                       PlayerEntityRenderState state, float limbAngle, float limbDistance) {
        if (state.equippedChestStack.getItem() instanceof JetpackItem) {
            matrices.push();

            var jetpackTexture = Jetpack.id("textures/entity/jetpack.png");
            var vertexConsumer = vertexConsumers.getBuffer(RenderLayer.getEntitySolid(jetpackTexture));
            this.getContextModel().copyTransforms(this.model);
            this.model.setAngles(state);
            this.model.render(matrices, vertexConsumer, light, OverlayTexture.DEFAULT_UV);

            matrices.pop();
        }
    }
}
There are a few things going on here. First of all, we load the jetpack texture that we created. This references the file we created above. It’s important to include the extension here (replace "jetpack" with your own mod id, obviously):
var jetpackTexture = Identifier.of("jetpack", "textures/entity/jetpack.png");
var vertexConsumer = vertexConsumers.getBuffer(RenderLayer.getEntitySolid(jetpackTexture));
this.getContextModel().copyTransforms(this.model);
this.model.setAngles(state);
this.model.render(matrices, vertexConsumer, light, OverlayTexture.DEFAULT_UV);
Then we copy the transforms and set the right angles. This is not strictly necessary in our case but it’s good to do this since it adapts the model to various situations, and it depends on where you attach your model: in this case we attach the model to the body, but if you attach it to a leg or arm it might get transforms applied to it. So it’s a good precaution to do this in any case.
var jetpackTexture = Jetpack.id("textures/entity/jetpack.png");
var vertexConsumer = vertexConsumers.getBuffer(RenderLayer.getEntitySolid(jetpackTexture));
this.getContextModel().copyTransforms(this.model);
this.model.setAngles(state);
this.model.render(matrices, vertexConsumer, light, OverlayTexture.DEFAULT_UV);
Finally we actually render the model:
var jetpackTexture = Jetpack.id("textures/entity/jetpack.png");
var vertexConsumer = vertexConsumers.getBuffer(RenderLayer.getEntitySolid(jetpackTexture));
this.getContextModel().copyTransforms(this.model);
this.model.setAngles(state);
this.model.render(matrices, vertexConsumer, light, OverlayTexture.DEFAULT_UV);
And that’s that.
Create the mixin for the feature renderer
Then, we need to hook up the feature renderer to the player entity model. We do this by injecting some code in the player entity renderer where we can use addFeature to add our feature renderer.
There are two parts to this: the PlayerEntityRendererMixin to inject the constructor and an accessor mixin to be able to invoke the addFeature method, because it’s protected and we don’t have direct access to it.
First, the accessor mixin. This method is defined on LivingEntityRenderer (and not PlayerEntityRenderer, but that’s a subclass), so we need to add the mixin for that class. We define an interface which defines the method with an @Invoker annotation:
@Mixin(LivingEntityRenderer.class)
public interface ILivingEntityRendererInvoker<T extends LivingEntity,
                                              S extends LivingEntityRenderState,
                                              M extends EntityModel<? super S>> {
    @Invoker("addFeature")
    boolean addFeature_mixin(FeatureRenderer<S, M> feature);
}
The generics look scary, but they are just copied from LivingEntityRenderer itself to match.
I don’t completely understand why, but we can’t use addFeature for the mixin name, as it results in a StackOverflowException at runtime. So we choose addFeature_mixin (you can pick something else if you want), and use that in our PlayerEntityRenderer constructor mixin:
@Mixin(PlayerEntityRenderer.class)
public class PlayerEntityRendererMixin {
    @Inject(at=@At("TAIL"), method="<init>")
    public void init(EntityRendererFactory.Context ctx, boolean slim, CallbackInfo info) {
        var invoker = (ILivingEntityRendererInvoker)this;
        var renderer = (PlayerEntityRenderer)(Object)this;
        invoker.addFeature_mixin(new JetpackFeatureRenderer(renderer, ctx.getEntityModels()));
    }
}
This creates a mixin that will be executed at the end of the regular constructor, which will call addFeature using our invoker we defined before. We need to cast to 2 instances here: one for the invoker call, casting to the interface we created:
var invoker = (ILivingEntityRendererInvoker)this;
var renderer = (PlayerEntityRenderer)(Object)this;
invoker.addFeature_mixin(new JetpackFeatureRenderer(renderer, ctx.getEntityModels()));
and once for the renderer itself, because we need it for our feature renderer constructor:
var invoker = (ILivingEntityRendererInvoker)this;
var renderer = (PlayerEntityRenderer)(Object)this;
invoker.addFeature_mixin(new JetpackFeatureRenderer(renderer, ctx.getEntityModels()));
Now that we have both we can add the feature to the renderer:
var invoker = (ILivingEntityRendererInvoker)this;
var renderer = (PlayerEntityRenderer)(Object)this;
invoker.addFeature_mixin(new JetpackFeatureRenderer(renderer, ctx.getEntityModels()));
This effectively links our feature to the player renderer, causing it to render only we have the jetpack equipped:
@Override
public void render(MatrixStack matrices, VertexConsumerProvider vertexConsumers, int light,
                   PlayerEntityRenderState state, float limbAngle, float limbDistance) {
    if (state.equippedChestStack.getItem() instanceof JetpackItem) {
        matrices.push();

        // ...

        matrices.pop();
    }
}
Create the mixin to register the entity model
Now that that’s out of the way, we need to hook up our entity model we defined in getTexturedModelData() so the system knows about it. We do this by creating another mixin, this time for EntityModels.getModel():
@Mixin(EntityModels.class)
public class EntityModelsMixin {
    @Inject(at= @At(value = "INVOKE", shift = At.Shift.AFTER,
            target = "Lnet/minecraft/client/render/entity/model/SalmonEntityModel;getTexturedModelData()Lnet/minecraft/client/model/TexturedModelData;"), \
            method="getModels")
    private static void getModels(CallbackInfoReturnable<Map<EntityModelLayer, TexturedModelData>> info,
                                  @Local ImmutableMap.Builder<EntityModelLayer, TexturedModelData> builder) {
        var layer = JetpackEntityModel.JETPACK;
        builder.put(layer, JetpackEntityModel.getTexturedModelData());
    }
}
This is a bit of a special mixin, since we’re adding an invoke to a method after an existing call. I looked at the source of getModels() to find a good place. I decided on inserting the jetpack model as the first model, so we are going to insert it here:
        // ...
        TexturedModelData texturedModelData48 = DrownedEntityModel.getTexturedModelData(new Dilation(0.25F));
        TexturedModelData texturedModelData49 = SquidEntityModel.getTexturedModelData();
        TexturedModelData texturedModelData50 = DolphinEntityModel.getTexturedModelData();
        TexturedModelData texturedModelData51 = SalmonEntityModel.getTexturedModelData();
        // <-- here
        builder.put(EntityModelLayers.ALLAY, AllayEntityModel.getTexturedModelData());
        builder.put(EntityModelLayers.ARMADILLO, texturedModelData29);
        builder.put(EntityModelLayers.ARMADILLO_BABY, texturedModelData29.transform(ArmadilloEntityModel.BABY_TRANSFORMER));
        builder.put(EntityModelLayers.ARMOR_STAND, texturedModelData44);
        builder.put(EntityModelLayers.ARMOR_STAND_INNER_ARMOR, texturedModelData45);
        builder.put(EntityModelLayers.ARMOR_STAND_OUTER_ARMOR, texturedModelData46);
        // ...
The mixin works by finding the target, in this case SalmonEntityModel.getTexturedModelData(), and inserting the code of our mixin after that line. I’ll refer you to the Fabric mixin docs for how to create the target argument, but it’s not hard (class, method name, return value).
In our mixin, we refer to a local variable (using the @Local mixin annotation) for accessing the builder to associate the jetpack entity model with our model texture data.
    private static void getModels(CallbackInfoReturnable<Map<EntityModelLayer, TexturedModelData>> info,
                                  @Local ImmutableMap.Builder<EntityModelLayer, TexturedModelData> builder) {
        var layer = JetpackEntityModel.JETPACK;
        builder.put(layer, JetpackEntityModel.getTexturedModelData());
    }
And… that’s it.
Finally
You now should have the result similar to the screenshot in the beginning of this post (depending on what you changed, your model is likely very different).
I have to admit I still don’t fully understand half of what is going on here, and I figured out most of it by experimenting and observing other code. Building a model required a lot of experimentation to find the right values (once I got the hang of it and understood the coordinate system it was easier, but still). You could use BlockBench and export your model as a Java entity model, I guess.